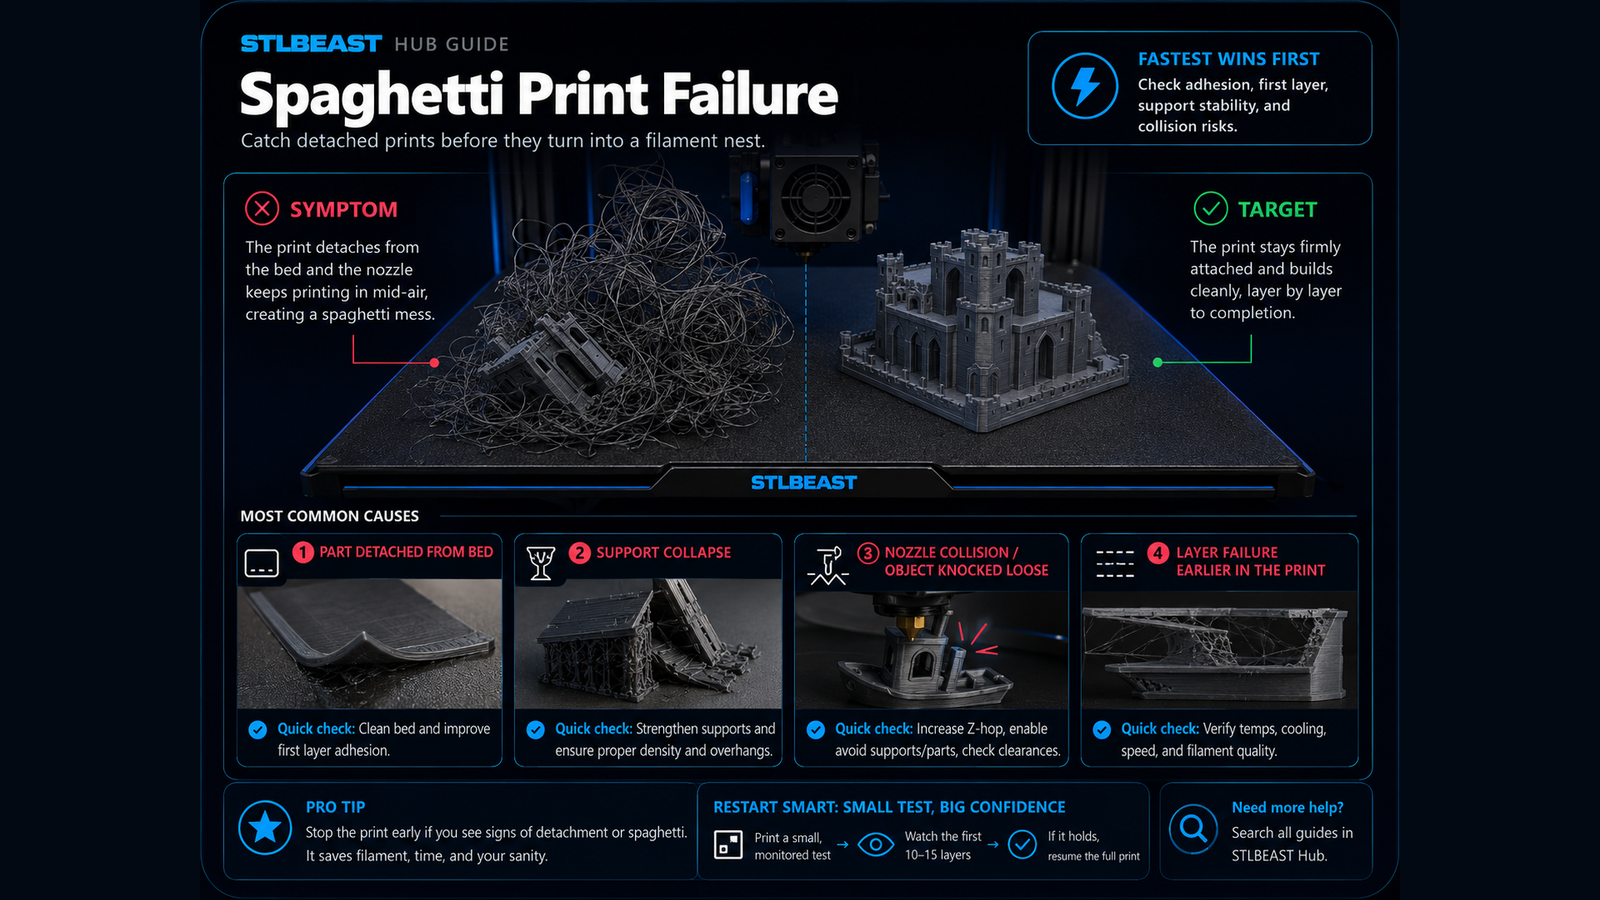
Fix prints that detach, shift, collapse, or continue extruding loose filament into a tangled spaghetti failure.
Fast answer
Stop the print safely, identify whether the part detached, shifted, lost support, or stopped extruding correctly, then fix that root cause before repeating the full job.
Repair the single root cause instead of increasing several settings at once.
Print a reduced test section or shorter representative model before restarting the full job.
Use monitoring or scheduled checks for long prints, but never depend on monitoring to replace a correct setup.
Safety and accuracyStop the printer before touching tangled filament near moving or hot components. Follow the printer manufacturer’s service and safety instructions.
Fast decision path
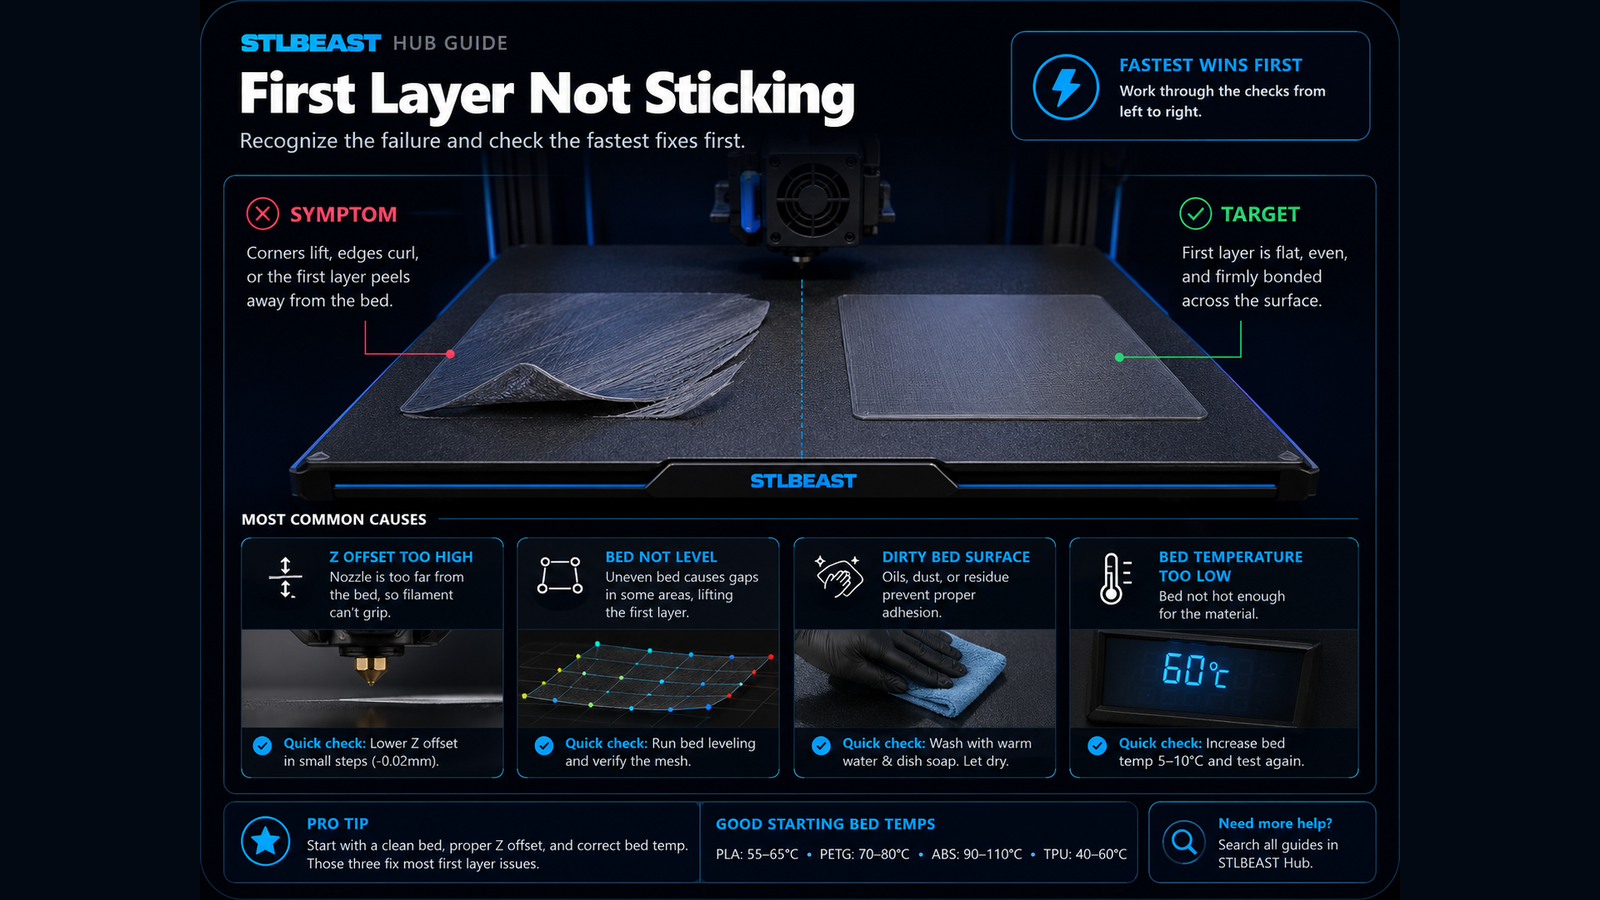
1If you see evidence of part detached from the build plate
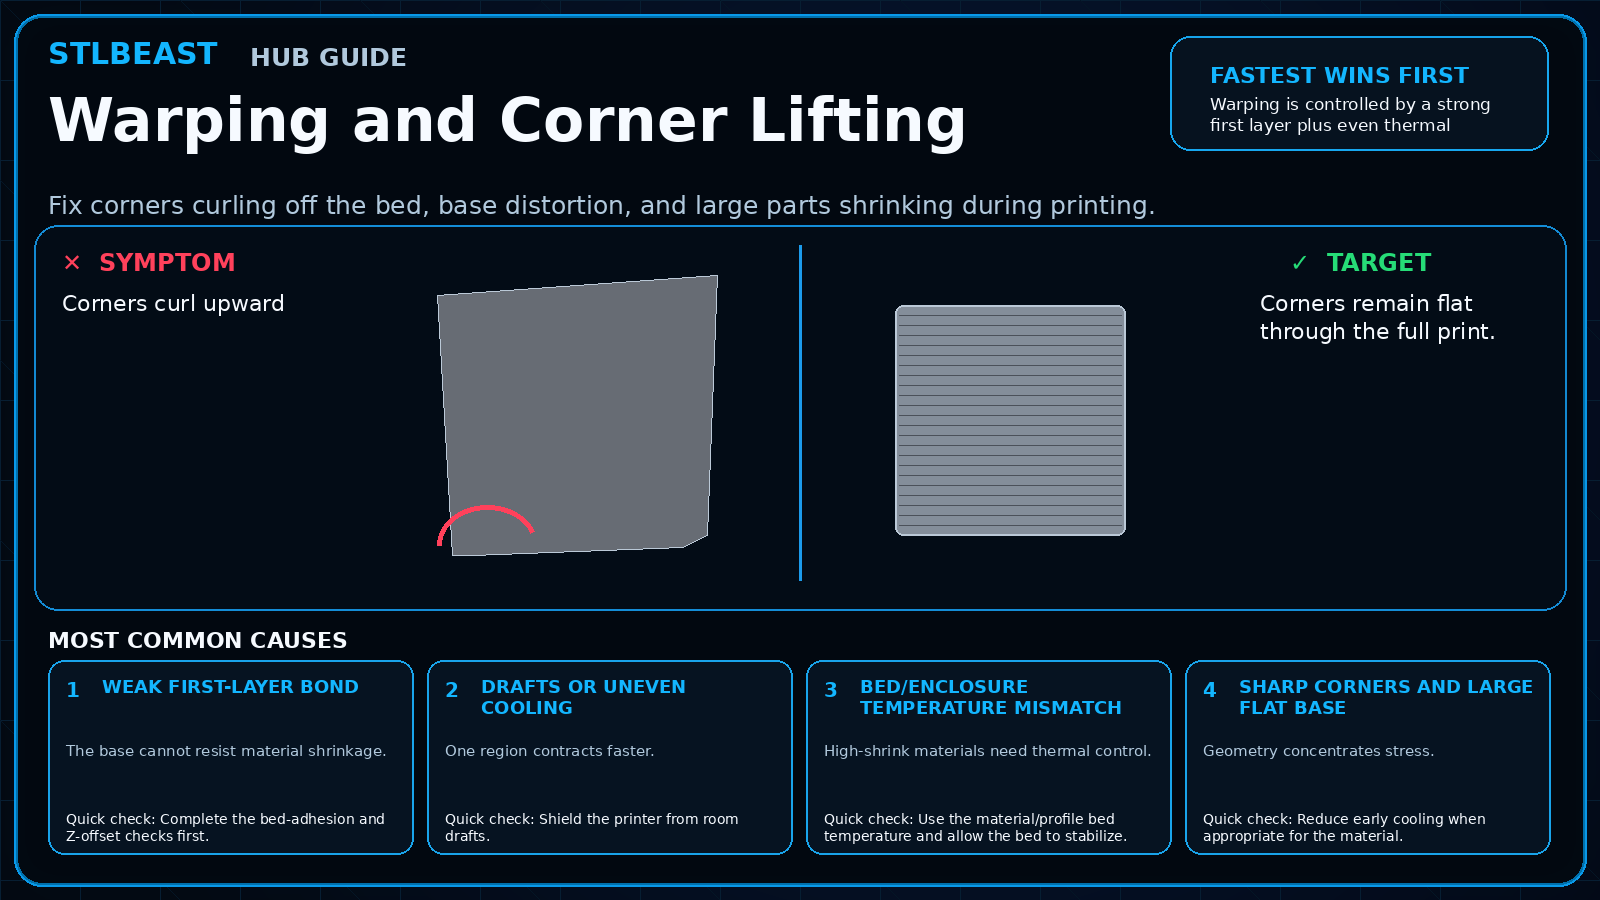
Adhesion, warping, collision, or a dirty surface allowed the model to move. Confirm it with the smallest safe test before continuing.
2If you see evidence of support or small feature failed
The slicer continued printing above missing geometry. Confirm it with the smallest safe test before continuing.
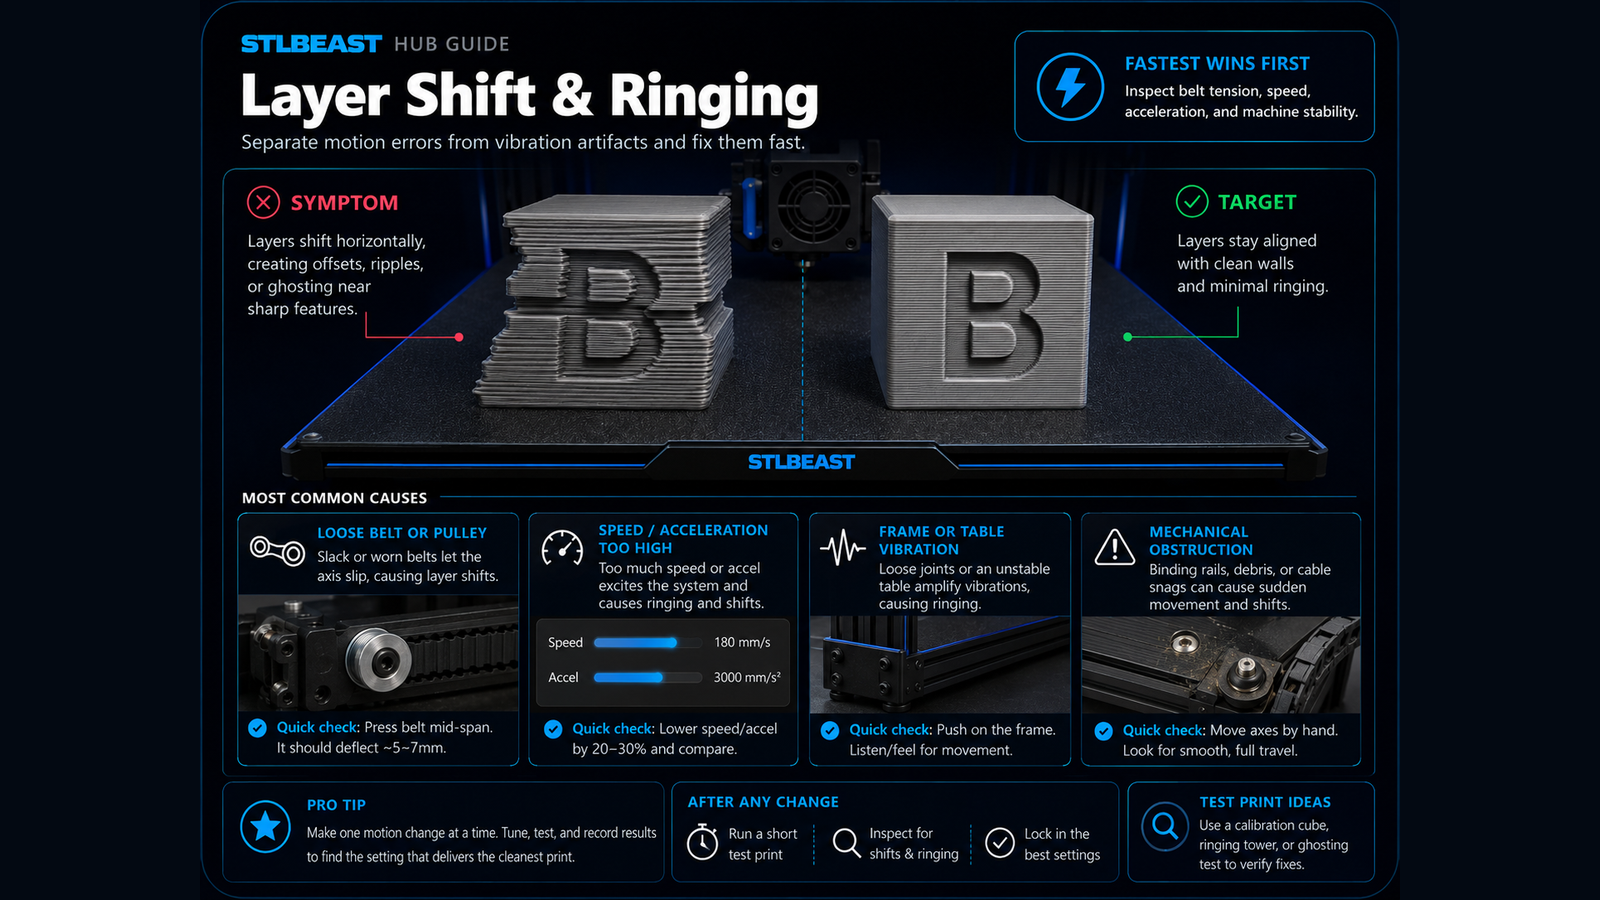
3If you see evidence of nozzle collision or layer shift
Raised edges, over-extrusion, loose motion components, or excessive acceleration displaced the print. Confirm it with the smallest safe test before continuing.
Settings to review
Setting
How to use it
First-layer adhesion
Confirm surface cleanliness, Z offset, bed temperature, and contact area.
Supports and islands
Inspect every layer in preview and strengthen only the unsupported regions.
Travel and collision risk
Use safe travel behavior and fix curled edges or over-extrusion before raising Z-hop.
Speed and acceleration
Reduce motion loads for tall, narrow, heavy, or weakly supported geometry.
Material notes
PLA
Check early cooling, heat creep on long enclosed jobs, and tall-part stability.
PETG
Watch for nozzle deposits, stringing, sticky supports, and excessive first-layer squish.
ABS/ASA
Control enclosure conditions and warping forces.
Resin
A detached support or suction-heavy cross-section can create a different failure path; inspect the vat and cured debris.
Printer context
Bedslinger
Check bed seating, gantry alignment, belts, eccentric wheels, and first-layer consistency across the plate.
CoreXY
Start from the official machine profile; inspect belt balance, input shaping, flow, pressure advance, and chamber conditions.
Delta
Confirm delta calibration, tower movement, belt tension, effector stability, and full-bed mapping.
Resin / SLA
Use resin-specific exposure, lift, support, temperature, wash, cure, and personal-protection procedures.
Where to look in the slicer
OrcaSlicer / Bambu Studio
Process → Quality, Strength, Speed, Support and Filament settings; use calibration tools for temperature, flow and pressure advance.
PrusaSlicer
Print Settings, Filament Settings and Printer Settings; inspect the sliced preview and layer slider before export.
Cura / Creality Print
Quality, Walls, Top/Bottom, Material, Speed, Travel, Cooling, Support and Build Plate Adhesion.
Resin slicers
Printer/resin profile, exposure, lift/retract, support contact, raft and hollow/drain settings.
How to verify the fix
The model remains fixed through a representative height
Supports remain intact and every island begins correctly
No raised edge or deposit contacts the nozzle
Extrusion stays consistent during the test
Prevent it next time
Preview every layer before long prints
Use a brim or orientation change only when geometry requires it
Keep the spool path free and the printer maintained
Check long jobs at sensible intervals
Printer Settings preview
Useful sample now. Full personalized profile for members.
Every visitor can use the guide and receive a practical sample. Members unlock the complete printer/material profile, exact adjustment order, copy/export controls, saved Profile Vault history, and deeper AI Doctor linkage.
First-layer adhesionConfirm surface cleanliness, Z offset, bed temperature, and contact area.
Supports and islandsInspect every layer in preview and strengthen only the unsupported regions.
STLBEAST ecosystemFix and learn on Hub. Build with validated files on STLBEAST.com.
Disclosure: Hub.STLBEAST is an educational resource. Some recommended-tool links may be affiliate links, including Amazon Associate links, and STLBEAST may earn from qualifying purchases at no extra cost to you.