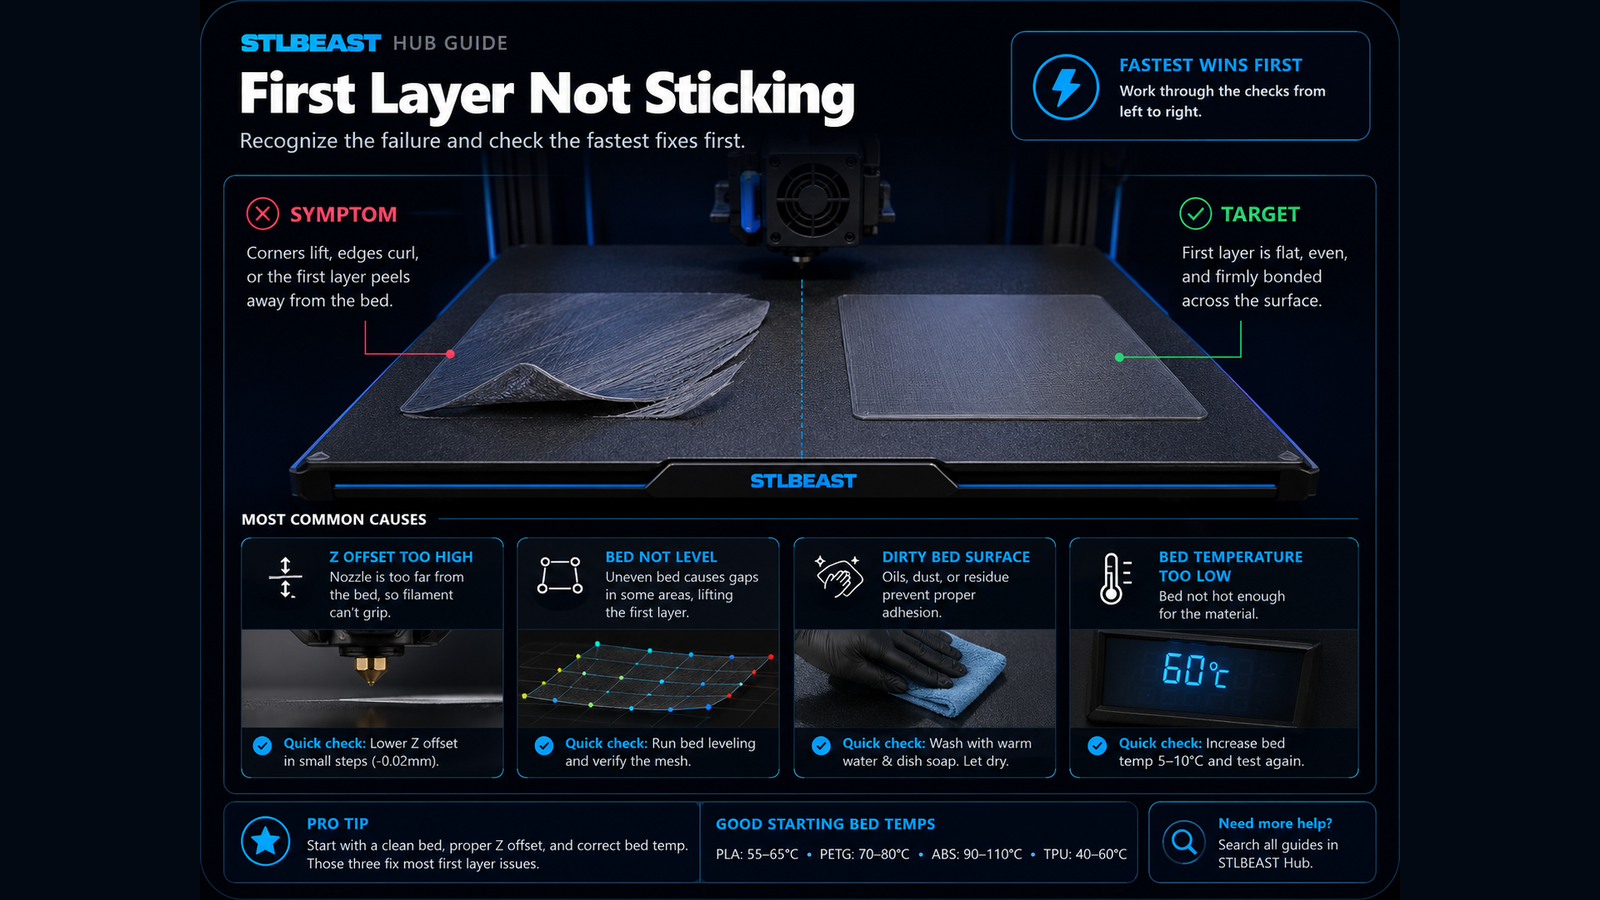
Fix poor bed adhesion, lifting first layers, loose corners, and prints that detach from the build plate.
Fast answer
Clean the build surface, confirm the correct surface for the material, then tune Z offset and first-layer temperature before adding glue or changing many slicer settings.
Use the visual comparison first, then follow the ordered checks below.
Before you change settings
Confirm the exact printer, material, nozzle or resin, slicer, and recent hardware changes.
Clean and correctly seat the build plate before adjusting Z offset or flow.
Return extreme overrides to a known profile and change one variable at a time.
Use a small calibration object or representative model section before repeating a long print.
What it looks like
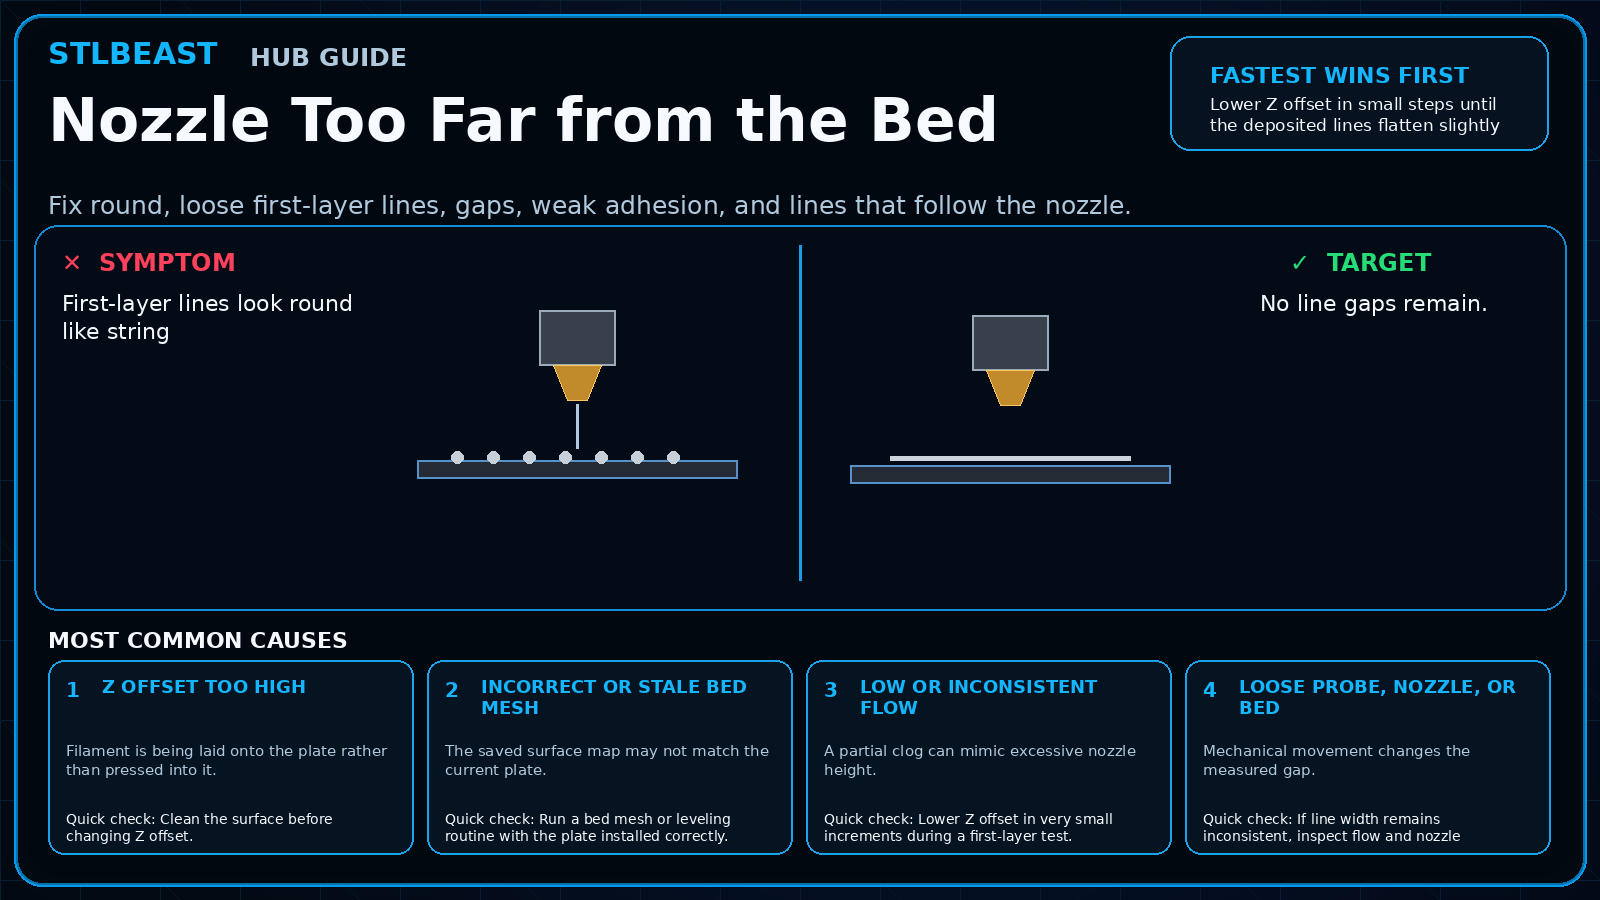
Lines move when the nozzle passes nearby
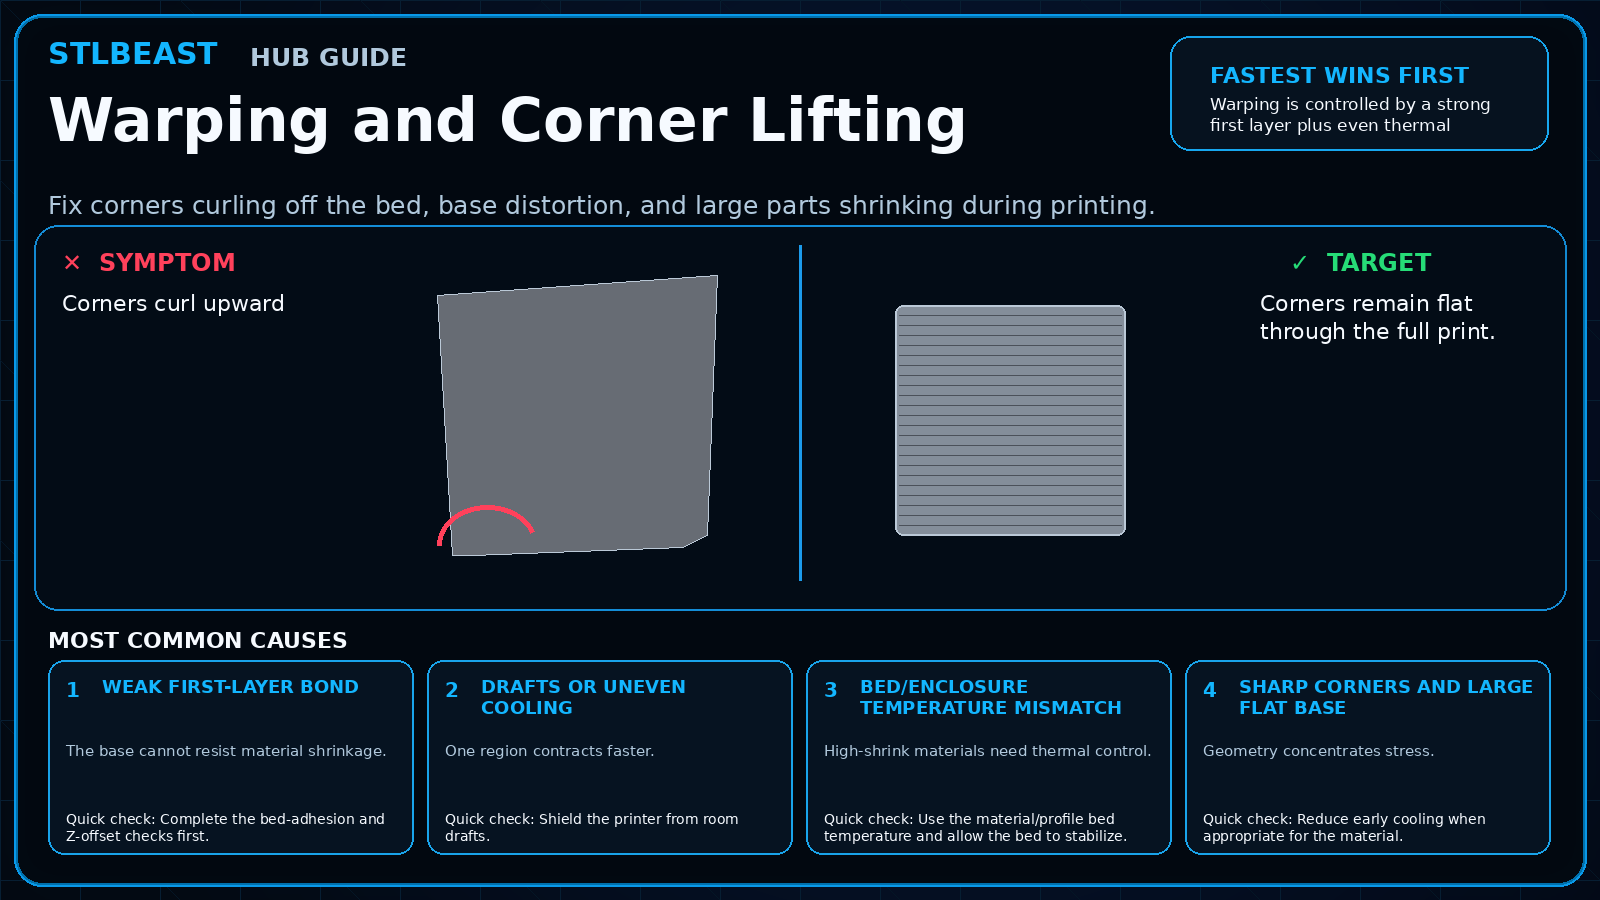
Corners lift during the first few layers
The skirt sticks but the model does not
One side sticks while another side is loose
Most likely causes
Dirty or contaminated build surfaceSkin oils and residue can defeat an otherwise correct profile.
Z offset too highThe lines sit on the plate instead of being pressed together.
Bed temperature or surface mismatchThe material may need a different plate, temperature, or release layer.
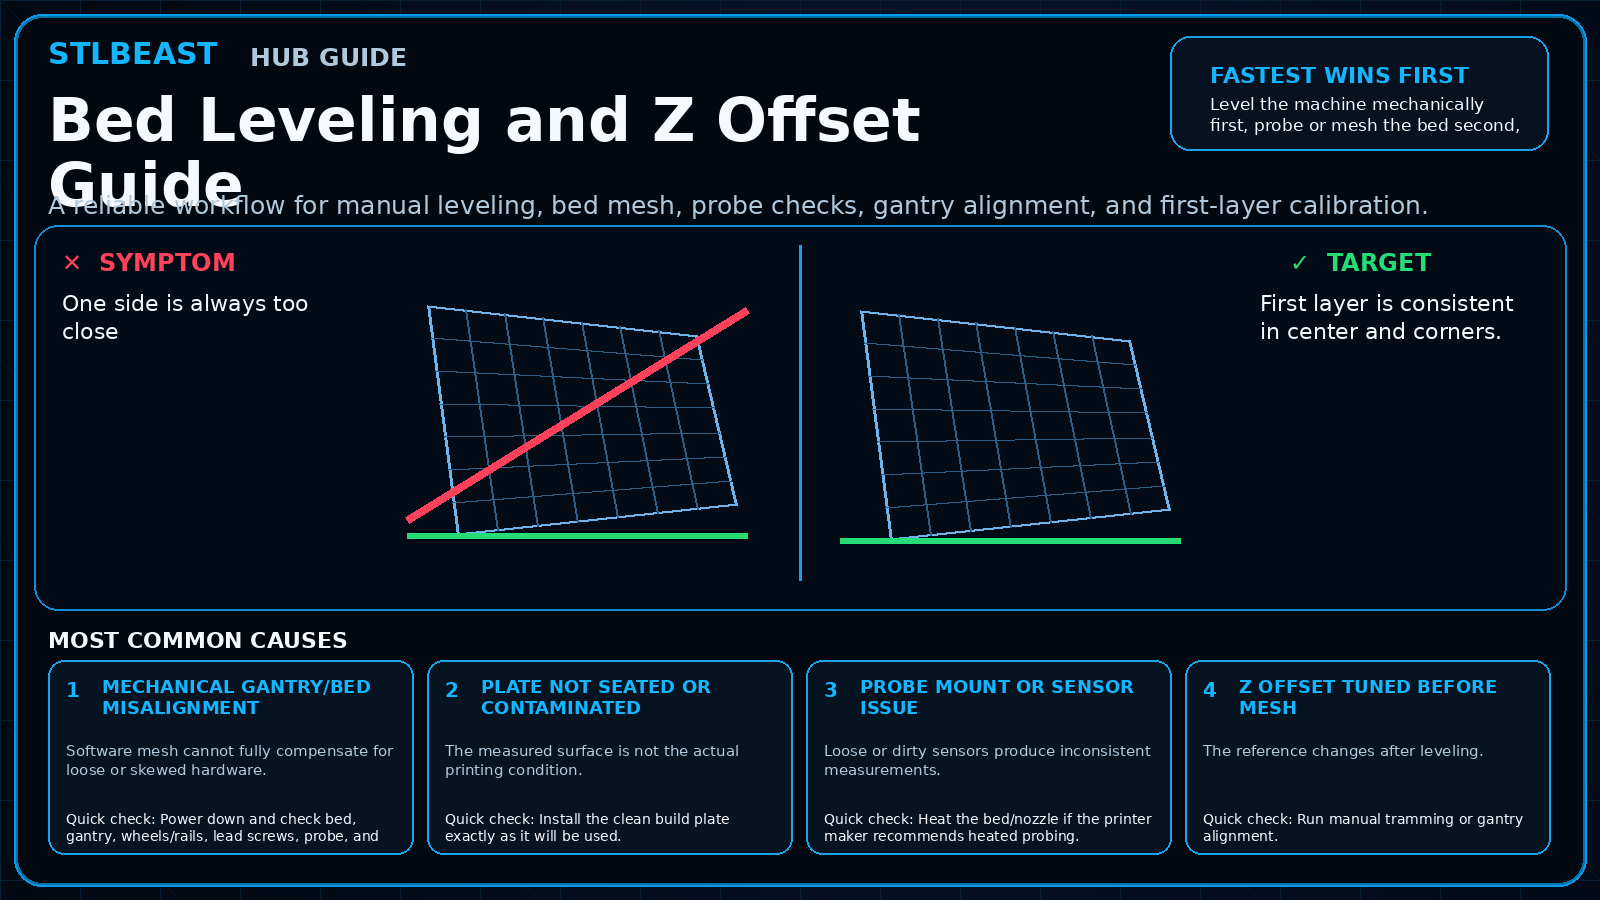
Uneven bed mesh or loose build plateA good Z offset in one area can be poor elsewhere.
Drafts or aggressive early coolingEdges cool and contract before the base is stable.
Repair sequence
Work from top to bottom. Stop when the failure is resolved, verify it with a small test, and record the successful setup.
Wash or clean the plate using the surface manufacturer’s approved method; avoid touching the print area afterward.
Run bed mesh or leveling, then print a single-layer test across several bed locations.
Adjust Z offset in very small increments until adjacent lines touch without ridges or transparent scraping.
Confirm the slicer selected the correct build surface and material profile.
Use a slower first layer and the filament maker’s temperature range.
Reduce early fan or shield the printer from drafts when the material requires it.
Add a brim only after the mechanical and surface checks are correct.
Safety and accuracyChange one variable at a time and keep every adjustment inside the printer, hotend, build-surface, and filament manufacturer limits.
Fast decision path
1If you see evidence of dirty or contaminated build surface
Skin oils and residue can defeat an otherwise correct profile. Confirm it with the smallest safe test before continuing.
2If you see evidence of z offset too high
The lines sit on the plate instead of being pressed together. Confirm it with the smallest safe test before continuing.
3If you see evidence of bed temperature or surface mismatch
The material may need a different plate, temperature, or release layer. Confirm it with the smallest safe test before continuing.
Settings to review
Setting
How to use it
Z offset
Adjust only until lines merge cleanly; too low can obstruct extrusion.
First-layer speed
Use a conservative first layer so the filament has time to bond.
Bed temperature
Start with the material profile and move in small increments.
Brim
Use for narrow contact areas, tall parts, or sharp corners.
Material notes
PLA
Usually prefers a clean PEI-compatible surface and moderate bed heat.
PETG
Often needs less squish than PLA and may require a release layer on very adhesive surfaces.
TPU
Print slowly and avoid excessive squish that can create drag.
ABS/ASA
Usually benefits from enclosure control and protection from drafts.
Printer context
Bedslinger
Check bed seating, gantry alignment, belts, eccentric wheels, and first-layer consistency across the plate.
CoreXY
Start from the official machine profile; inspect belt balance, input shaping, flow, pressure advance, and chamber conditions.
Delta
Confirm delta calibration, tower movement, belt tension, effector stability, and full-bed mapping.
Resin / SLA
Use resin-specific exposure, lift, support, temperature, wash, cure, and personal-protection procedures.
Where to look in the slicer
OrcaSlicer / Bambu Studio
Process → Quality, Strength, Speed, Support and Filament settings; use calibration tools for temperature, flow and pressure advance.
PrusaSlicer
Print Settings, Filament Settings and Printer Settings; inspect the sliced preview and layer slider before export.
Cura / Creality Print
Quality, Walls, Top/Bottom, Material, Speed, Travel, Cooling, Support and Build Plate Adhesion.
Resin slicers
Printer/resin profile, exposure, lift/retract, support contact, raft and hollow/drain settings.
How to verify the fix
A full first-layer test stays attached across the plate.
Lines touch with no gaps and no raised ridges.
Corners remain flat through the first 10–20 layers.
The finished print releases normally after cooling.
Prevent it next time
Store plates clean and covered.
Re-run mesh/Z checks after nozzle or hotend work.
Save a verified profile per plate and material.
Avoid using more adhesive to hide a leveling or extrusion problem.
Printer Settings preview
Useful sample now. Full personalized profile for members.
Every visitor can use the guide and receive a practical sample. Members unlock the complete printer/material profile, exact adjustment order, copy/export controls, saved Profile Vault history, and deeper AI Doctor linkage.
Z offsetAdjust only until lines merge cleanly; too low can obstruct extrusion.
First-layer speedUse a conservative first layer so the filament has time to bond.
STLBEAST ecosystemFix and learn on Hub. Build with validated files on STLBEAST.com.
Disclosure: Hub.STLBEAST is an educational resource. Some recommended-tool links may be affiliate links, including Amazon Associate links, and STLBEAST may earn from qualifying purchases at no extra cost to you.